Friday, October 17, 2014

Multiple-Me

Multiple Me

Assignment #3: Multiple Me or Multiple Places

For this project you will create 2 images that composite different (multiple) photographs together.

It's very similar to the "Levitation" images we made using PS layers. 

  • TIP: When you're shooting, be sure to set your camera exposure and focus to manual. And DO NOT move your camera! 
You want your two final photographs to be connected visually and thematically. 

  • TIP: Be thoughtful about the content – what ideas are you addressing? How does the composited image facilitate these ideas? Is the work narrative-based – do you want to tell a story? Are you interested in blurring the boundaries between fantasy and reality? Etc.

We'll all do several in class, then you will do two more on your own. One of them should use you as the subject.

Assignment:
You will post your 2 photographs to the blog / dropbox and bring in your 2 photographs to project in class for critique.

DUE: October 24 BEFORE CLASS

For inspiration look at artists: Kelli Connell, Anthony Goicolea, Deborah Oropollo, Peter Funch
  
The Space Between from "Double Life," Kelli Connell
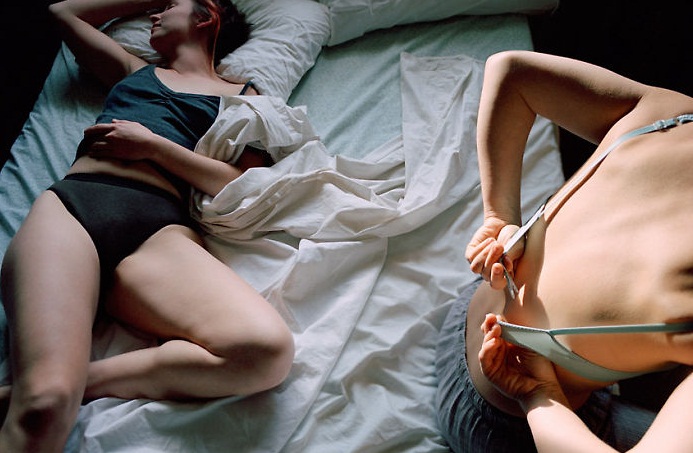
Getting Up from "Double Life," Kelli Connell

From the series "You and What Army" by Anthony Goicolea

From the series "Deja Vu" by Peter Funch

Care Taker from the series "Babel Tales" by Peter Funch

From the series "Rapport" by Claudia Rogge

Think combination or montaged images are only a recent development from the advent of Photoshop?

Check these out: 
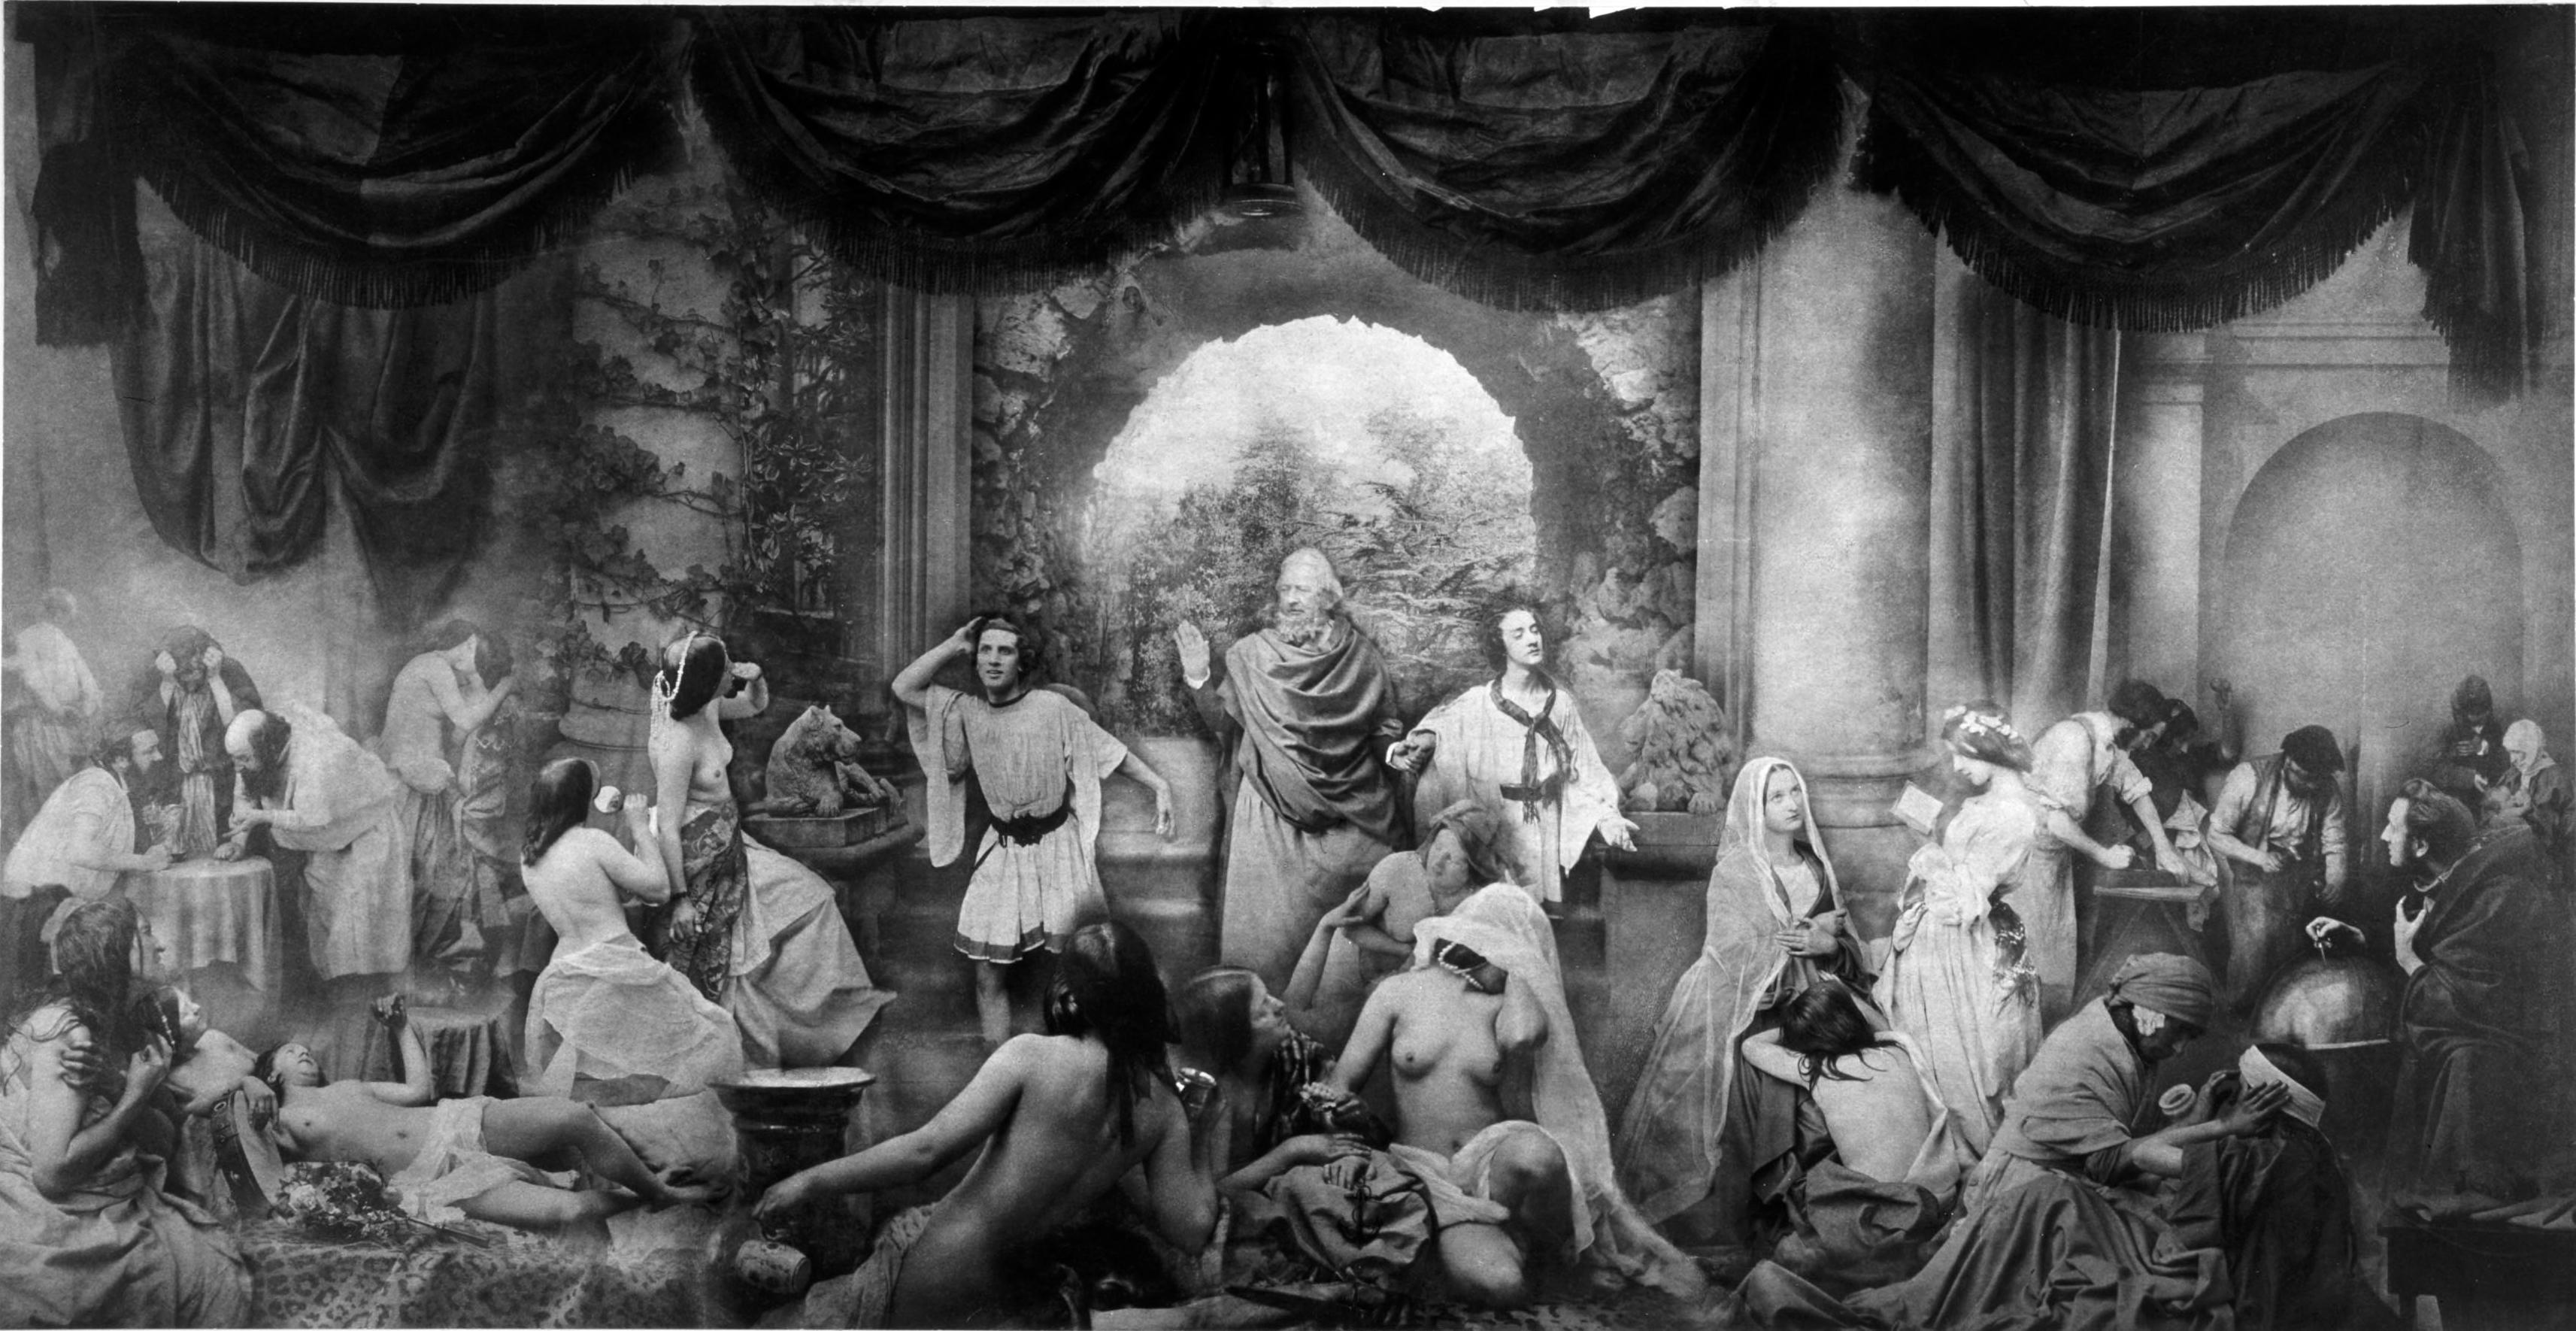
Oscar Gustave Rejlander's allegorical tableaux The Two Ways of Life consisted of over 32 negatives. 1857 

Henry Peach Robinson's famous morbid image Fading Away. 1858


Helpful Guides:

  • http://content.photojojo.com/inspiration/a-digital-guide-to-cloning-yourself/
  • http://paintthemoon.net/blog/2011/07/photoshop-actions-how-to-creating-a-composite-image-combining-multiple-photos-to-create-magic/
More inspiration:

How to do this step by step:
  1. Shoot 2 images. 1 with yourself in one position and 1 where you have moved to a new location.
  2. Locate your images. 
    • Process in Lightroom. (make sure color/exposure/density is the same!)
      • "Sync" photos.
  3. Open both images in Photoshop.
    • Unlock background layers.
    • Locate one image. Hit (Command)⌘A to select all, and then ⌘C to copy. Locate your other image and ⌘V to paste. (Or drag and drop)
      • You can lower the opacity on one layer and use the move tool (v) to align the two images.
  1. Once they are where you want them, Go to the Layers Palette. Make sure one layer is selected. Drag this layer onto the layer mask icon to create a layer mask.

5. It should now look like this: 


6. With the white box in the layer mask selected, press ⌘I to invert the layer. Your screen should now look like this:


7. Select your brush tool (B) and make sure that your painting with white. Using 100% opacity, paint out the subject to erase it from view. 


    •  When finished, save one copy with the layers as a PSD. This is a working file for your records, in case you want to go in and change anything later. 
      • Now go to Layer -- and Flatten Image.
        • Save this copy as a TIFF (for print) and as a JPEG, to upload to blog.
  1. Lastly, upload your 2 completed "Multiple Me" to the dropbox link no later than before class on 10/24. 
  2. We will critique the "Levitation," and "Multiple Me," assignments next class, Oct 24. Please post to theses BEFORE class, and bring your files / cameras with you to class. We will learn to print, and if time allows, talk about the Final Portfolio.

Friday, October 10, 2014

Storm's Levitation

Levitation in class
10/10/2014
Stormy Scott

James Ford


Alex Salas. Levitation. BOOOOOOYAAAAAAAAAA

In Class Work

This is where we will post all mini assignments we do in class. 

Levitation and Multiple Me

Next project, Levitation!


Example of historical levitation photography

Remember, photographers have been manipulating images long before photoshop!

Falling Teacher

Now that we have each made one Levitation image in class, and each of you is now a pro... For the next assignment, you will create 3 amazing Levitation images! Using either yourself or a model for the image. (It must contain a person)

  • Think about the story you will try to tell. Consider the background, lighting, color, costume, hair, props, and accessories... I want an AWESOME ONE!
  • Here are some helpful links for inspiration and tutorials:

Here are two really great tutorials, that go a little more in depth.
*using Selections: http://youtu.be/ZM0dc9qix9Y
  • He demonstrates syncing photos using Camera Raw in Adobe Bridge. You will be doing this in Lightroom. You can skip to 1:40.
* using Layer Masks: http://youtu.be/HprleMPd1WY

Inspiration Images/Links:


Student Example

Student Example


Assignment for this week: "Levitation"


  • I want you to upload the Levitation image to the blog that we did in class. Title your post: Levitation - Class.
  1. For the AWESOME assignment, You will take a minimum of two photographs for each image. One of the empty scene and one with you, another person, or an object "levitating."
  2. Locate your images. 
    • Process in Lightroom. (make sure color/exposure/density is the same!)
      • "Sync" photos.
  3. Open both images in Photoshop.
    • Locate your empty scene image. Hit (Command)⌘A to select all, and then ⌘C to copy. Locate your Levitating image and ⌘V to paste.
  4. In the Layers Palette, make sure the empty scene is selected. Drag this layer onto the layer mask icon to create a layer mask.
5. It should now look like this: 

6. Hit ⌘I to invert the layer. Your screen should now look like this:


7. Select your brush tool (B) and make sure that your painting with white. Using 100% opacity, paint out the object to erase from view. 
  • As you get closer to your body, you can lower the brush hardness, as well as the opacity and flow. This will allow for a cleaner erase and a more realistic "Levitation."

    1.  When finished, save one copy with the layers as a PSD. This is a working file for your records, in case you want to go in and change anything later. 
      • Now go to Layer -- and Flatten Image.
        • Save this copy as a TIFF (for print) and as a JPEG, to upload to blog.
  1. Lastly, upload the In Class Levitation, under the "In Class" tag to the blog no later than before class on 10/17. 
  2. The 3 images for your AWESOME Weekly assignment, will be due PRINTED 10/24. Please post to the blog BEFORE class, and bring your files / cameras with you to class on 10/17. We will learn to print.

Week 7: Recap. Camera Functions and Levitation.

Today in class we went over manual camera functions and learned how to use a DSLR (Canon T3i). We Learned all about ISO, Aperture, and Shutter Speed. There is a video refresher and reference sheets below. We also looked at the Camera Simulator. 

Photography Fundamentals


Canon Rebel Quick Reference Sheets


We also had an In-Class shooting assignment where we learned how to make a "Levitation" image. Check under the Assignments tab for a tutorial and list of due dates. 

Falling Teacher


Thursday, October 9, 2014

Portraiture


And here are a few of my favorite portraits from my favorite photographers.

1. Yousef Karsh - Best known for strategically placing each individual part of the body in the most natural positions without making it look or feeling awkward for the subject. He also used multiple lighting equipment to emphasize certain areas of the subject. Proven in his portrait of Winston Churchill, he utilized multiple lights to separate subject from background and enhance the lighting on his hands.
2. Richard Avedon -  Glorious Work in Black and White Studio portraiture. He was commonly known for head and shoulder portraits of celebrities. The portrait of Andy Warhol exposes more than just a likeness image. Avedon captured part of the artist's personality. 
3. Annie Leibovitz - Modern Day Digital Genius (in my opinion anyway)  She has created several series using digital media. Her use of bold colors and eccentric poses are what draws my attention to her photographs more often. I loved her work on her Disney Dream Series,but her more natural portraits impress me just as well. 
4. Arnold Newman - He took more than likeness portraits. He included the personality, occupation, hobby or the mindset of each individual subject. His approach included natural lighting more than individual light set ups. He photographed his subjects mostly in their natural setting instead of a studio.
5.Kenny Braun -  I love how he marries his lighting technique with electronic flash and daylight or window light. I can't download any of his images so his link is included.
The link shows a perfect example of his usage of lighting techniques.


Friday, October 3, 2014

James Ford


II

http://www.pondly.com/2012/02/portraits-by-olga-shvartsur/

all 5 of these images are character I have seen on tv in either movies or tv shows or even both.


Lindsey Shirley